Taking It Down: Removing a Vertical Garden and Repairing the Wall
You are moving in six weeks, and there is a planted wall to undo. The question underneath the search is usually “how bad is this”, and the honest answer is that the holes are the easy part, and two other things are not.
Here is the order that leaves the least trace.
Start Earlier Than Feels Necessary
The single most useful thing on this page.
Repairs need drying time, and paint needs the repair to be dry. A filler that has not cured shows through paint, and a patch painted too soon shows as a different sheen from every angle in the room.
If the wall is damp behind the system, it needs to dry before anything else happens, and that is measured in days or weeks rather than hours.
And you may find something you were not expecting, which is the actual argument for starting early. A problem found six weeks out is a problem you can solve. The same problem found the night before the inspection is a deduction.
Step 1: Take it Apart in the Right Order
Photograph everything first, including the wall behind, as it appears the moment you expose it. That record is worth having if there is any later disagreement about what was there before.
Empty the containers before you unmount anything. A planted system is at its heaviest when saturated, and lifting a loaded panel down off a wall is both the hardest and the most damaging moment in the whole removal. Our article on what a vertical garden actually weighs covers why the loaded weight is so much larger than people expect.
Let it dry briefly if the medium is wet. A dry system is lighter and does not drip down the wall on the way out.
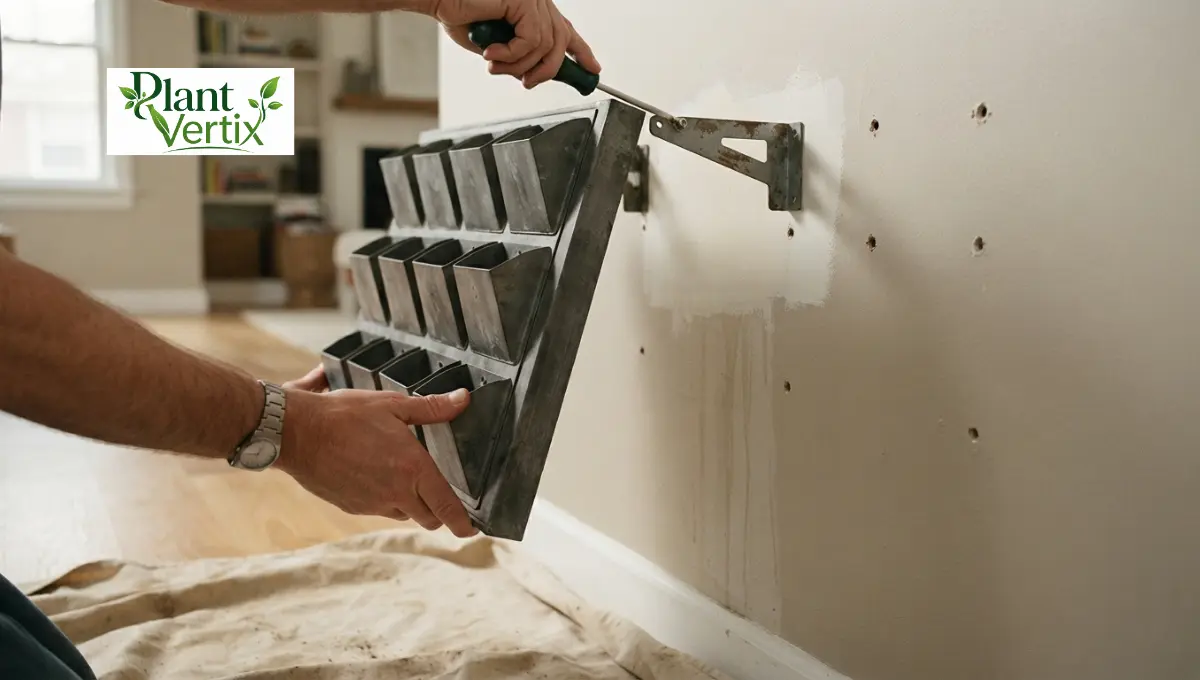
Then unmount, with a second person if there is any doubt. The failure people describe is a panel swinging on its remaining fixing and gouging the wall on the way down.
Step 2: Look at What is Actually There
Now you can see the wall, and there are four things to find.
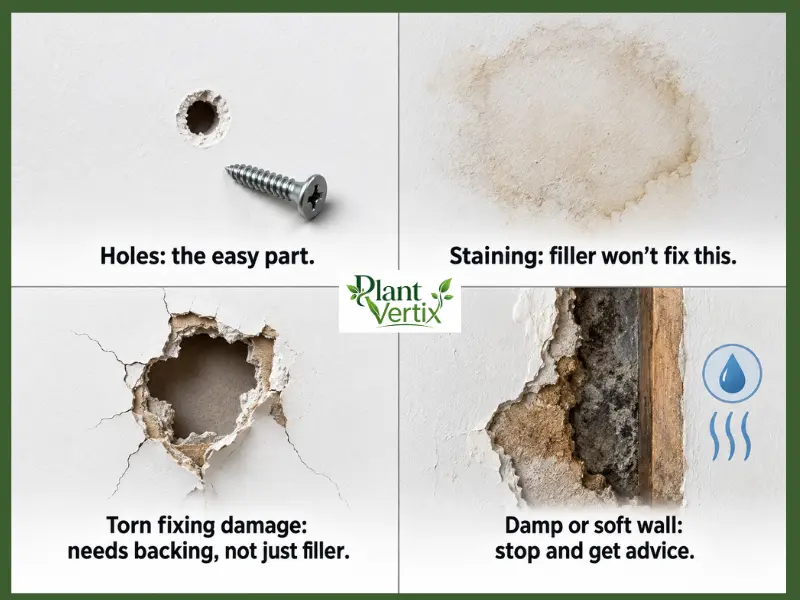
Holes. The easy part.
Marks and staining, usually from water and usually worse than expected because the system was hiding them.
Damage around a fixing, meaning a torn hole rather than a clean one, which happens when an anchor was pulling on the wall for months.
Damp, softness or crumbling. This is the one that changes the job.
If the wall is soft, discoloured in a way that spreads, smells musty, or has a surface that comes away when touched, stop and get advice. That is not a filler-and-paint repair, and it may indicate a problem that was there before your plasterer or one your plasterer made worse. In a rented property, this is a conversation with the landlord rather than a repair to attempt quietly, and if there is any suggestion of a leak from behind the wall, it is a professional’s job.
Step 3: The Holes
This is the standard part, and there is nothing special about it because a planter made them.
Remove the fixings completely. Any anchor that expanded behind the surface has to come out or be pushed through, depending on type. A screw left flush and painted over is visible, and it will be found.
Clean the hole out so filler has something to key to.
Fill it, in the way the specific product tells you to. This site names no product and quotes no drying time, because both belong to the container in your hand, and the instructions on it are the ones that apply.
Expect to fill twice. Most fillers shrink slightly as they dry, and a single application on a deeper hole leaves a dimple that shows under paint.
Sand it flush. Gently, and be aware that sanding wall surfaces produces fine dust; work with the window open and protect the floor and anything you care about in the room.
A torn or oversized hole is a different job. Beyond a certain size, it needs backing rather than filling, and if you have never done that, this is a reasonable point to pay somebody. A badly done large patch is more visible than the hole was.
Step 4: The Two Problems Filler Does Not Fix
Staining and marks
Water leaves marks that filler and sanding do not touch, and paint over a stain often lets the stain back through.
This is a paint problem rather than a filling problem, and the usual approach is to seal the area before painting so the mark does not bleed. The product you use will say whether it does that; read the tin rather than a website.
The prevention was a barrier and an air gap, which is the whole subject of our article on protecting the wall behind a mounted system. It is too late for this wall, and it is the thing to do differently at the next place.
Paint matching
Nobody’s touch-up matches. Paint fades, yellows and dulls at different rates depending on light, and a patch of the original colour applied today will not match the original color applied three years ago.
Two honest options.
Patch and accept a visible difference, which is fine on a small repair in a low-traffic place.
Repaint the whole wall, corner to corner, which is the only reliable way to make a repair invisible. It is more work, and it is what people end up doing on a large area.
If you kept a note of the paint when you moved in, or if the landlord has it, that is worth asking for. It gets you closer, and it still will not match a wall that has been on that wall for years.
Step 5: The Floor and Everything Else
The wall gets the attention, and the floor is where the surprises are.
Look under where the system stood. Standing water, marks on a floor covering, a patch of carpet that has been permanently damp, or a mark on a wooden floor from a drip tray that overflowed once.
Check the skirting or baseboard, which is where runoff collects and where water damage shows first.
And check anything adjacent that was in the splash zone: an outlet cover, a radiator, a piece of trim.
FAQ
How long before a move should I start taking a mounted planter down?
Earlier than feels necessary. Filler needs to cure before paint goes on, a patch painted too soon shows as a different sheen across the room, and a wall that is damp behind the system needs days or weeks rather than hours to dry. The real argument for starting early is that you may find something you were not expecting, and a problem found six weeks out is solvable in a way the same problem found the night before an inspection is not.
Should I empty the planters before unmounting?
Yes, and it is the single easiest thing to get wrong. A planted system is at its heaviest saturated, and lifting a loaded panel off a wall is the hardest and most damaging moment of the whole removal. Let a wet medium dry briefly, so it is lighter and does not drip down the wall on the way out, and use a second person if there is any doubt.
Can I just paint over a water stain?
Usually not. Paint over a stain often lets the mark bleed back through, and filler and sanding do not touch it either, because this is a paint problem rather than a filling problem. The usual approach is to seal the area first, and the product you use will state whether it does that, so read the tin rather than a website.
Will touch-up paint match the rest of the wall?
No. Paint fades, yellows and dulls at different rates depending on light, so the original colour applied today will not match the same colour applied years ago. Either patch and accept a visible difference, which is fine on a small repair in a low-traffic spot, or repaint the wall corner to corner, which is the only reliable way to make the repair disappear.
What if the wall behind is soft, crumbling or musty?
Stop and get advice. Surface that comes away when touched, discoloration that spreads, or a musty smell is not a filler-and-paint repair, and it may be a problem that predates your planter or one the planter made worse. In a rented property, it is a conversation with the landlord rather than a quiet repair, and any suggestion of a leak from behind the wall is a professional’s job.
If You Are Still Installing Rather Than Removing
This page is more useful before the fact than after it, and the three things that make removal easy are all decisions made at the start.
Fewer fixings, because every one is a repair.
A barrier and an air gap, so the wall behind is never wet.
Or no wall fixings at all. A freestanding system takes nothing to remove and leaves nothing to repair, which is why it is the default for a rented property, and it is genuinely the version of this project with the least exposure. The choice between freestanding and mounted is covered separately on this site.
If you are somewhere you may not be for long, that trade is worth making at the beginning rather than discovering it six weeks before a move.